Biggest Thermal Master P1 Mobile Thermal Camera Buying Mistakes (And How to Avoid Them)
Thermal imaging has moved from specialized industrial instruments to pocketable accessories for contractors, inspectors, hobbyists, and outdoor enthusiasts. The Thermal Master P1 Mobile Thermal Camera is one of the products aimed squarely at users who want a convenient, phone‑centric thermal tool. That convenience can be compelling, but buyers often make avoidable mistakes when choosing a mobile thermal camera. This article explains the most common errors purchasers make with devices like the Thermal Master P1, provides a careful analysis of the product's strengths and weaknesses, and offers practical guidance to help buyers match features to real‑world needs.
Introduction: Who the Thermal Master P1 is for
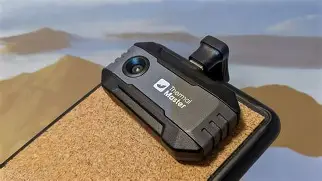
The Thermal Master P1 positions itself as a mobile thermal camera intended primarily for smartphone attachment and on‑the‑go inspections. Typical buyers include:
- Home inspectors and contractors checking insulation, roofs, and moisture intrusion.
- Electricians locating hot spots in panels or wiring.
- HVAC technicians diagnosing duct leaks and system imbalances.
- Automotive technicians checking engine and exhaust heat patterns.
- Outdoor users and hobbyists who want wildlife observation or night navigation support.
Understanding which of these real‑world use cases matches the buyer’s needs is the first step to avoiding costly mistakes.
Product analysis: Thermal Master P1 Mobile Thermal Camera
The Thermal Master P1 is a compact, phone‑focused thermal accessory. It relies on a companion app for visualization, measurement presets, and image capture. The following analysis looks at functional areas buyers care about: image quality, sensitivity, measurement capability, usability, software, and durability.
Image quality and sensor characteristics
Mobile thermal cameras balance physical size and cost against sensor resolution. The P1 delivers a level of detail suitable for close‑range inspections (walls, electrical panels, HVAC units) but will show limitations at longer distances or for fine, small targets. Buyers who need to inspect small components from several meters away should evaluate whether the P1’s sensor resolution and optics meet their distance‑to‑spot (D:S) requirements.
What matters: resolution (pixels), thermal sensitivity (NETD), and lens field of view. Higher resolution and lower NETD produce clearer images and better detection of small temperature differentials.
Temperature range and accuracy
The typical temperature range for mobile thermal attachments covers common building and mechanical work — from sub‑ambient temps to several hundred degrees Celsius. The P1 provides sufficient range for most domestic and light commercial tasks. However, buyers who routinely measure very high temperatures (industrial furnaces, kilns, turbochargers) should confirm the stated range and accuracy against their use cases.
Accuracy matters more than range for many inspections. A wide range is useful, but stable, repeatable accuracy (and the ability to set emissivity) is crucial when quantifying problems.
Software, usability, and file management
The companion app is the gateway to the P1’s capabilities. Good apps offer emissivity adjustment, spot and area measurement modes, color palette selection, image fusion (overlay thermal over visible), and straightforward export of images and video. The P1’s app focuses on mobile convenience: live view, snapshots, and easy image sharing. For professional workflows, buyers should check what export formats are supported (e.g., radiometric images vs. flattened PNG/JPEG) and whether the app allows metadata and calibration data to be preserved.
Physical fit, battery, and build quality
Because the P1 connects to a smartphone, compatibility and mechanical fit are practical considerations. Some users prefer a cableless Bluetooth/Wi‑Fi connection; others value a direct physical connector for lower latency and guaranteed power. Battery life depends on whether the device draws from the phone or has an internal battery — both approaches have tradeoffs for endurance during extended inspections.
Real‑world performance
In hands‑on scenarios, the P1 excels for quick diagnostics: spotting missing insulation behind drywall, detecting overloaded circuits, and tracing heat leaks around windows. It is less appropriate as a primary diagnostic tool when measurements must be certified or used as final evidence in compliance reports unless the buyer confirms radiometric capture and calibration.
Find top-rated Cameras & Photography products at great prices.
See Deals →Pros & Cons
- Pros
- Compact and highly portable — easy to carry for on‑the‑go tasks.
- Quick setup and phone‑based workflow make it accessible to non‑specialists.
- Useful for common inspection tasks such as building envelope checks and electrical troubleshooting.
- Often lower cost than dedicated handheld thermal cameras with similar nominal resolution.
- Cons
- Sensor resolution and sensitivity can limit detection of small, distant targets.
- Reliance on a companion app can constrain workflow; not all apps support radiometric exports.
- Fit and connection method may not be compatible with all phone models or protective cases without adapters.
- Durability and environmental resistance (water/dust rating) may be lower than professional standalone units.
Comparison: Thermal Master P1 and common alternatives
| Model | Sensor resolution (approx.) | Thermal sensitivity / NETD | Usability | Notable strength |
|---|---|---|---|---|
| Thermal Master P1 | Mid‑range (good for close inspections) | Designed for typical building and electrical differentials | Smartphone app driven; lightweight | Portable, cost‑effective for routine inspections |
| Compact smartphone thermal (entry alternatives) | Lower to mid (varies) | Moderate; best at detecting clear hotspots | Plug‑and‑play; basic feature set | Lowest cost; easiest to carry |
| Dedicated handheld thermal camera | Higher resolution options available | Lower NETD (better sensitivity) | Standalone UI, robust export and measurement tools | Reliability and professional measurement accuracy |
Note: The table above is qualitative to help buyers understand where a mobile attachment like the P1 sits relative to entry‑level compact add‑ons and purpose‑built handheld devices. For exact numeric specifications, consult the manufacturer’s technical documentation and ensure they match the intended use.
Biggest buying mistakes with mobile thermal cameras (and how to avoid them)
Mistake 1 — Buying on price alone
Thermal cameras span a wide price range. A low price may reflect smaller sensors, higher NETD, or minimal software. Buyers who select a camera primarily on cost often find the images lack the detail needed for diagnostic work.
How to avoid: Define the primary use case first (e.g., “locate missing insulation within 2 m” or “find hotspots in an electrical panel”). Then compare sensors and NETD values against that use. Spending a bit more on better sensitivity or resolution usually pays off in usable images and fewer false positives.
Mistake 2 — Overlooking emissivity and measurement settings
Thermal cameras measure surface radiation, not temperature directly. Incorrect emissivity settings or ignoring reflective surfaces leads to erroneous readings—common when scanning glass, shiny metal, or wet materials.
How to avoid: Make sure the camera’s app allows emissivity adjustment and that the buyer understands basic emissivity correction. For reflective surfaces, use tapes or paint as reference points, or use contact thermometers for verification.
Mistake 3 — Misjudging distance and lens limits
Many buyers expect the same performance at 10+ meters as they get at 1–2 meters. Optical resolution and the D:S ratio determine how small a target can be resolved at distance. Mobile attachments with wide fields of view sacrifice spot resolution.
How to avoid: Check the device’s recommended working distance and D:S ratio for intended tasks. If inspections will be done at distance (e.g., roof inspections from the ground), consider a camera with a narrower field of view or higher native resolution.
Mistake 4 — Assuming all smartphone integration is equal
Compatibility problems, poor app design, and limited export options can be frustrating. Some apps do not support radiometric images, meaning temperature data is lost when saving to standard image formats.
How to avoid: Confirm phone compatibility (OS version, connector type), test the app if possible, and verify export formats. For professional work, ensure radiometric capture or external software support exists to preserve measurement data.
Mistake 5 — Ignoring environmental and build quality
Mobile cameras are often used on job sites where drops, dust, and moisture are likely. Buying a fragile attachment without protection or ruggedness reduces its practical lifespan.
How to avoid: Look for IP ratings, drop specs, and the availability of protective cases. Consider how the device will be carried and whether a small pocketable unit or a bare‑metal sensor better fits the work environment.
Discover deals on Cameras & Photography — updated daily.
View Offers →Buying guide: How to choose the right Thermal Master P1 configuration (or alternative)
This buying guide gives a checklist of features and decisions that align the buyer’s needs with the product capabilities.
1. Clarify the intended use cases
- Quick home checks (drafts, missing insulation): prioritize portability and reasonable resolution.
- Electrical panel diagnosis: prioritize sensitivity and the ability to resolve small hot spots at short range.
- Roof or building exterior scans from the ground: prioritize higher resolution, narrower FOV, and better D:S ratio.
- Automotive or engine work: ensure the camera handles higher temperatures and supports spot measurement.
2. Check sensor resolution and NETD
Resolution determines how much detail the thermal image shows. NETD (Noise Equivalent Temperature Difference) expresses sensitivity — lower NETD equals better ability to detect small temperature differences. For professional inspections, aim for a combination that reliably shows contrasts relevant to the job.
3. Verify temperature range and accuracy
Identify the maximum and minimum temperatures to be measured in the buyer’s typical workflows and confirm that the camera maintains stated accuracy across that range. If the device claims radiometric capture, verify whether exported files retain that data.
4. Confirm phone compatibility and connection method
Decide between a physical connector (Lightning, USB‑C) and wireless connections. Physical connectors often offer lower latency and simpler power management, while wireless offers flexibility. Make sure the buyer’s phone model and case will work with the chosen connection.
5. Evaluate software features
- Emissivity adjustment
- Spot and area measurements with min/max/avg
- Image fusion and overlay
- Radiometric export (if required)
- Video capture and frame rates for transient thermal events
6. Assess ergonomics and physical durability
Consider how the device will be held or attached, whether protective cases or mounting accessories are needed, and whether it has any environmental rating for dust or water resistance.
7. Think about workflow and reporting
If images will be shared with clients or included in professional reports, confirm that image annotations, measurement overlays, and file export meet those needs. Ask if there are desktop tools or cloud services for organizing and archiving inspections.
8. Warranty and support
Check the warranty length and what it covers. For devices used in regular professional work, prioritize vendors with responsive technical support and clear calibration or repair pathways.
Practical tips for getting the most from the Thermal Master P1
- Use reference targets to check absolute readings: a blackbody is best, but a simple contact thermometer can validate spot checks.
- Adjust emissivity based on surface material. If unsure, test and record a known‑temperature reference surface.
- Avoid measuring through glass — it blocks thermal radiation and leads to false readings.
- When inspecting electrical panels, remove covers only when safe and allowed. Often the best images come from close, unobstructed views at short range.
- Capture both thermal and visible images when possible; fused images make findings clearer for clients and stakeholders.
- Keep the camera lens clean and avoid sudden temperature shocks to the sensor—a gradual transition prevents condensation.
Conclusion
The Thermal Master P1 Mobile Thermal Camera represents a compelling compromise for users who value portability and smartphone integration. It is well suited to routine building, electrical, and HVAC checks where quick diagnostics and visual evidence matter more than laboratory‑grade measurement precision. The most common buying mistakes — prioritizing price, ignoring emissivity, misunderstanding distance limitations, assuming universal app capabilities, and overlooking durability — are avoidable with a clear assessment of real‑world needs and a small amount of vetting.
Buyers who follow the checklist in this guide, verify app/export capabilities, and confirm that sensor characteristics match their typical inspection distances, will find mobile thermal tools like the P1 a valuable addition to their toolkit. For any use that requires verified, traceable temperature measurements, however, it’s important to confirm radiometric capture and calibration options before relying on a phone‑based thermal camera for professional or compliance work.